Why Use Raised Beds Instead Of Planting In The Ground?
You can read more at The Small Town Homestead.

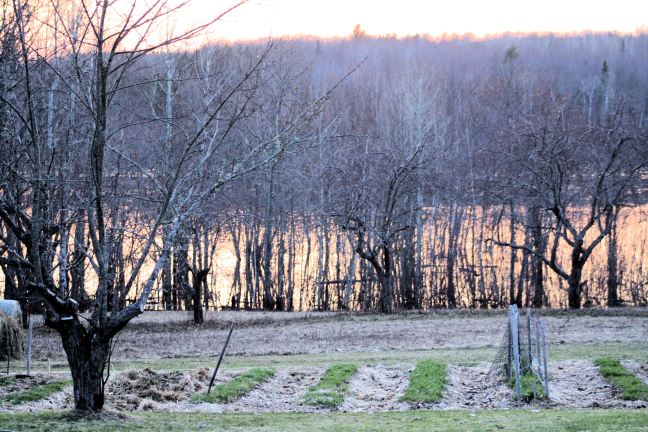
The quality of the soil determines the success of your garden. We have been working on our soil for several years by continually adding organic material. The lower garden has presented some challenges as it is situated at the bottom of an old orchard and the water drains to the garden. The solution chosen, raised rows, and last year half of the garden was a success. This year the other half is being prepared for the season. This half is very wet and drains poorly. Before we install drainage, we will be experimenting with straw bales and more raised rows to raise the plants out of the wet soil. As the bales compost down we are hoping to create the raised rows that will solve our wetness problems.
The straw bales are in place and conditioning started today.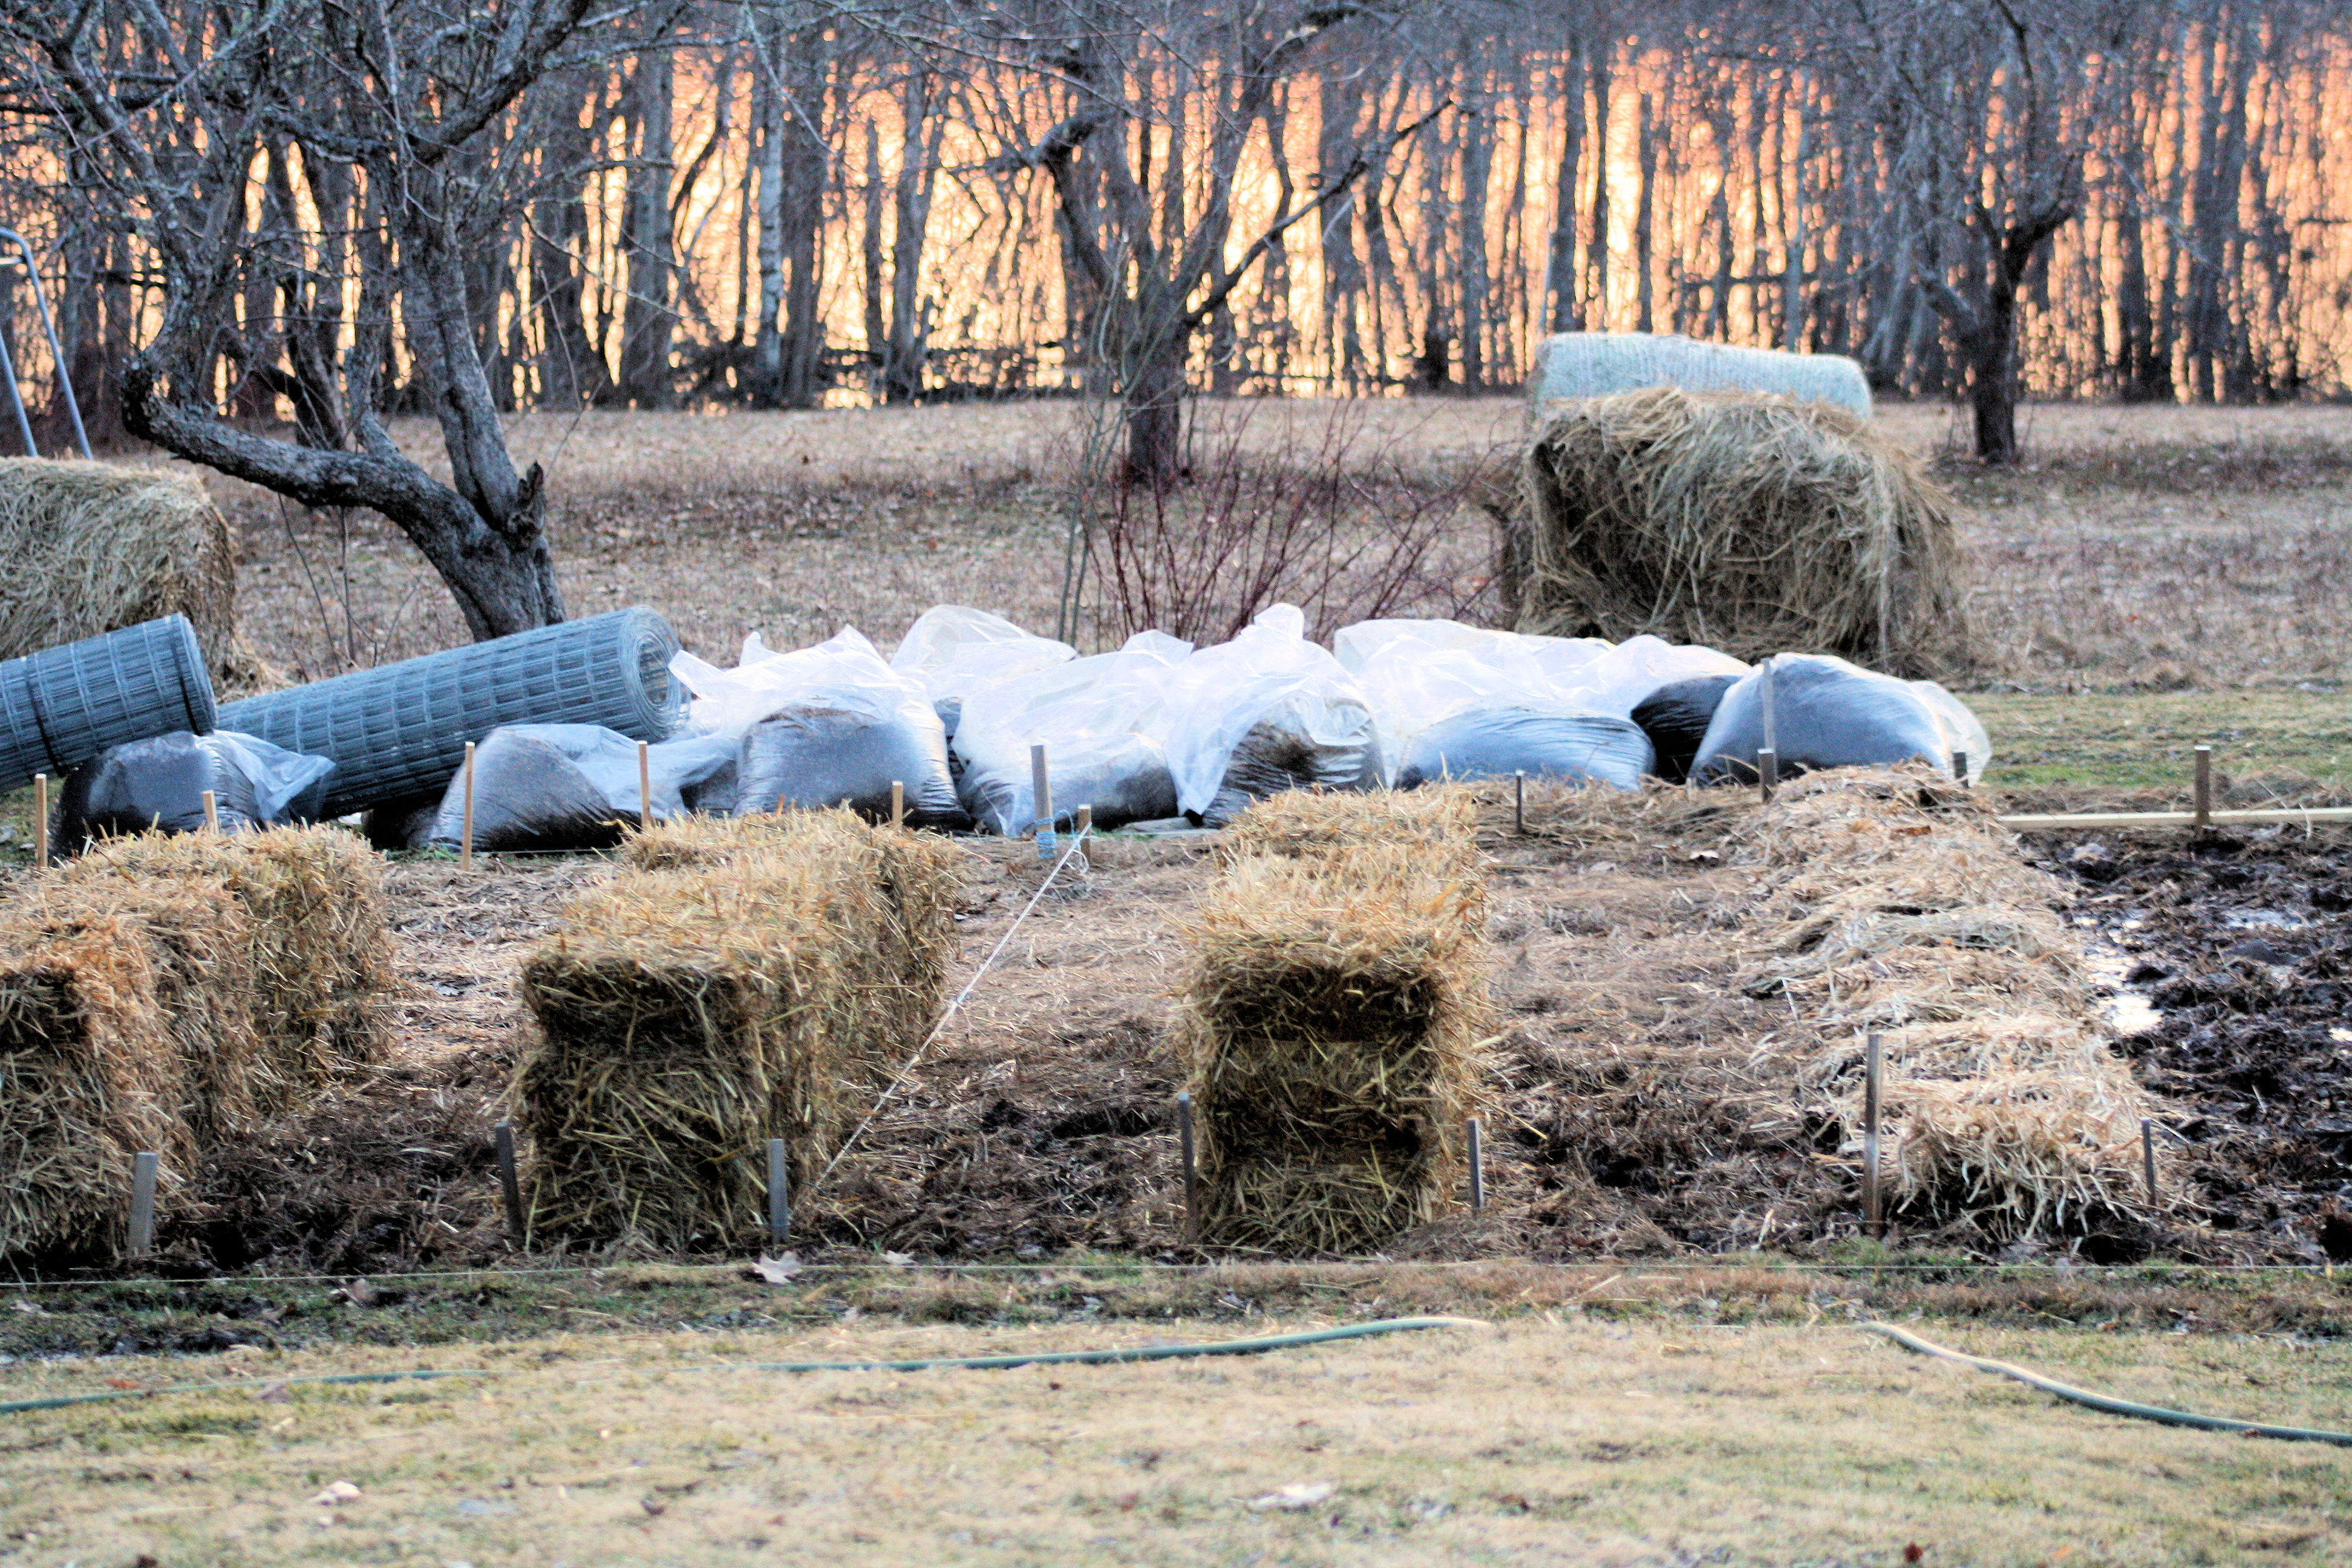
Whenever we come across good information to share with you we will post it. The following article is re-posted from The Gardening Channel and can help answer questions about common soil problems.
Whatever plants you are going to grow in your garden, you need the best quality soil possible. It should be well drained and aerated, with an ongoing supply of good quality nutrients. This may mean bringing in extra top soil; it invariably means adding compost and fertilizers to the soil.
Soil compaction
If you are establishing a new garden after building a new home, chances are you will have not only have lost a lot of your precious top soil, but what top soil there is left has been heavily compacted by all the machinery and building equipment on site during the building operation. Even construction of small garden buildings and features, or construction of amenities like decks, paths, walkways and patios can result in damage and compaction to the soil.
If soil is compacted, you can bring in an aerating machine that will open up small holes. This is particularly useful if the ground already has an established lawn on it. If the ground is bare, you need to get as much organic matter into it as you can. This will not only help to overcome the problems associated with soil compaction, but organic matter will also improve and increase the water-holding capacity of sandy soils and it will improve drainage of heavy, clay soils.
Another problem that often occurs during building operations, regardless of how big or small these are, is that established trees are threatened. If soil compaction around a tree you don’t want to lose is inevitable, or if it has already occurred, you can relieve the pressure, and prevent the roots from suffocating, by drilling holes into the ground from the trunk outwards, to the furthest line of leaves (which is where the roots will extend to). These should be about three inches in diameter and about a foot apart. Fill the holes with compost or with a mulch to which a root-promoting fertilizer has been added. This will allow water and air – as well as the fertilizer – to percolate through the soil and spread beneath the compacted soil and feed the roots.
Soil quality
There are three basic types of soil:
While sandy soils drain well, they don’t retain the water. This means that you need to water (or irrigate) more frequently, and fertilize more often because the soil won’t have all the nutrients plants need to grow. Also, because the water flows quickly through this type of soil, the water takes what nutrients there are away with it. The best way to improve the quality of sandy soil is to add organic matter in the form of some sort of organic amendment, compost for example.
Clay soils are the opposite of sandy soils because they are heavy and thick, and they don’t drain well at all. You can lighten them by adding compost and some coarse sand. But be sure to add fertilizer for extra nourishment as well.
Loam is the best type of soil, because it drains well and contains nutrients. However this doesn’t mean it will necessarily have all the nutrients you need. For this reason it is always a good idea to test soil to see whether it is alkaline or acid. You can also have a professional soil analysis done to assess what nutrients need to be added to improve the quality of your soil. Or, just add compost to your soil. It’ll work wonders in buffering the pH of soil, and add the nutrients the soil is lacking.
Soil drainage
Roots of just about all plants need a constant supply of oxygen to survive and thrive. When drainage is inadequate, the plants won’t get enough oxygen, apart from which the soil will also tend to become waterlogged. While there are a few plants that will thrive in waterlogged soil – in particular anything that grows well in a bog garden, and a few trees including the gorgeous American sweet gum (Liquidambar styraciflua) – you will have to take some stringent steps to improve the soil. One way to do this is to build mounds or raised beds and to fill these with soil that does drain well. Alternatively, if it isn’t just the soil to blame, you might need to build in a piped drainage system or establish a French drain for water that flows from the garden.
Soil bacteria
All soil contains bacteria (which are single-celled organisms), even healthy soil. While we all fear pathogenic bacteria – the sort that cause horrible diseases – there are many beneficial bacteria. In fact bacteria, along with certain fungi, play a key role in keeping soil healthy. This is largely because they are able to help decompose certain materials.
Soil pollution
Soil pollution is the result of man’s activities that end up with chemicals and other harmful materials leaching into the soil. Polluted soil is not suitable for growing plants and trees. If your garden soil is polluted, you need to identify the source of contamination, rectify this and then remove the polluted soil and replace it with good quality top soil.
Helpful solutions to soil problems
Here are some more helpful hints and tips that will help you solve soil problems.
Soil testing kits are available for you to test how acid or alkaline the soil in your garden is. Alternatively you can take soil samples to a specialist laboratory and ask them to do the soil testing for you. A thorough soil analysis will tell you the levels of all the nutrients in the soil as well as identify the structure of the soil and pinpoint what the pH levels are. It is the pH (which indicates whether your soil is acid or alkaline and just how acid or alkaline it is) that most commonly needs correcting. The scale varies from 1 to 14, and if the soil is neutral, it will appear as 7 on the pH scale. Anything below 7 is acidic, and anything above 7 is acid.
Add lime to correct acidic soils. Add sulfur to correct alkaline soils – or a fertilizer with a good bit of sulfur in it.
Soil amendments range from aged steer manure to mushroom compost. When you prepare a new bed for planting, spread two to three inches of an amendment over the existing soil and then dig it into the soil to a depth of between six and nine inches, so that the amendment and existing soil are well mixed.
Soil preparation before planting always pays huge dividends. If you start with good quality soil, you won’t have problems trying to improve it later. But this doesn’t mean you won’t have to feed and fertilize. Soil maintenance will ensure that the soil quality remains good, and your plants will continue to thrive over time.
Always use compost to improve the quality of soil, whether it is sandy, full of clay, or even if it is a good quality loam. Organic compost has a certain magic that encourages earthworms and various micro-organisms to migrate into the soil. It also works well as a mulch.
If you make your own compost with compost bins, choose a three-bin system so that you have new material, mid-term material and compost that is ready for use.
Raised beds are a good solution for gardens where there is poor drainage. They are more effective than mounds and berms, because they have solid walls (either timber or masonry) that hold the good soil in place. To be effective, raised beds should be at least six inches, but preferably up to about a foot, deep. Drill holes in the base soil (as for compacted ground) before filling with good quality top soil.
Choose healthy plants so that they don’t contaminate the soil in the rest of the garden. Take cuttings from friend’s gardens by all means, just be sure the plants they come from are healthy and not diseased or infested with garden pests.

Lately I have heard a lot about the rising cost of produce. Every week there is a story in the news about the drought in California, increased transportation costs, supply and demand issues, etc. At the same time I see bigger, brighter, fancier and over stocked giant grocery stores being built a car drive away from the consumer. I’m sure you pay for these fancy grocery stores too!
Then I look out my window and think that in a few weeks, I will be picking fresh salad greens, herbs, beans, peas, beets, carrots, turnips, potatoes, onions and strawberries all within a fresh morning walk and basically free. Through the off-season, canned and frozen fruit and vegetables that came from the garden, again for free!
Saving money. just another good reason to start a vegetable garden this summer if you have not done so already. Also a good reason to plan an expansion this year, maybe another raised bed or a few straw bales to increase production. Even a small plot will start you on the path of savings.
The following article is from the Gardening Channel and covers some financial advantages of growing your own garden full of fresh vegetables. It also goes into the “best bang for your buck” on which vegetables to grow to save the most.
Saving Money with Your Vegetable Garden: How Much You Could Save?
Growing your own vegetables is bound to save you money during those all-too-frequent grocery shopping trips. But if you plan strategically, you can maximize the dollar potential of your vegetable garden. And we don’t mean selling your crops, which results in instant profit. Instead, we list some of the best and worst financial choices for your vegetable garden based on $2 seed packet purchases. Of course, what you grow is subject to personal preference; these options are purely based on savings potential.
First, let’s take a look at those vegetables that make the least financial sense. Potatoes and onions are so inexpensive at supermarkets that you will not save that much money by growing your own. Also, vegetables like cauliflower and artichokes that are especially susceptible to disease or pest infestation may yield fewer crops, thereby adding to your grocery list. Now for money-saving crops.
Salad Greens
Bags of spinach, arugula, or Swiss chard can cost as much as $5 per bag in stores. These also do not stay fresh for long, so if you cannot use entire bags at once, you are actually losing money.
In order to ensure a continuous supply (not surplus) of fresh greens, plant some seeds each week. These easy-to-grow greens only need about 4-6 hours of sunlight per day and moist soil at least 6 inches deep.
How does this add up? If your garden ends up producing 20 weeks’ worth of salad greens and you previously bought 3 bags weekly for $4 each, you just saved $240 by growing your own versatile leafy greens.
Heirloom cherry tomatoes
With pint prices similar to salad greens, you can save lots of cash by producing your own heirloom cherry tomatoes. This variety has a longer growing season and higher yield, which makes financial sense.
Make sure your plants have at least 6 hours of sunlight per day. One plant can produce about 20 pints of heirloom cherry tomatoes.
How does this add up? If you produce 60 pints of cherry tomatoes per season and avoid spending $5 per pint, you just saved $300 this season.
Heirloom green beans
These heavy heirloom crops can cost as much as $6/lb in markets, much more than other green bean varieties, which makes these crops ideal money-savers. Each seed packet you buy can produce pounds of beans.
Full sunlight is necessary for these beans. And for maximum savings, opt for beans that grow upright on vines, which will yield additional pounds simply due to available space.
How does it add up? Assume ten plants produce three pounds of beans each: your savings comes to $180.
Herbs
Finally, an endless supply of herbs can make a real dent in your grocery bill. You can either spend $3 on a single fresh sprig or buy a four-pack of starter plants. Here’s where the savings really add up: each plant can produce 50 times as much as what you can get for that $3 at the supermarket.
Herb plants will need 4-6 hours of sunlight per day. Make sure to clip flower buds for maximum flavor.
How does this add up? If your four herb plants each produce 50 sprigs, you just saved $600 this season on herbs. However, this is a lot of herbs! Even if you only use the yield of one crop, your savings equals $150. Freeze the rest using filled ice cube trays to use over winter.
Start saving your money!
Tom
Original Source: http://www.gardeningchannel.com/maximizing-vegetable-garden-savings/
For additional resources on how to best utilize your vegetable garden to save money, visit:
http://online.wsj.com/news/articles/SB123983924976823051
http://msue.anr.msu.edu/news/can_a_vegetable_garden_save_you_money
http://www.marketplace.org/topics/your-money/numbers/how-much-does-organic-gardening-really-save-you
http://www.newdream.org/blog/2011-09-calculating-the-savings-in-growing-your-own-food

Soaking seeds before planting is an old-time gardener’s trick that many new gardeners are not aware of. When you soak seeds before planting, you can significantly decrease the amount of time it takes for a seed to germinate. Let’s look at the reasons for soaking seeds and how to soak seeds.
What happens to seeds when you soak them? Why should you soak your seeds?
The short answer is because your seeds were designed to be abused. Mother Nature is not kind to a little seed. In the wild, a seed can expect to encounter harsh heat and cold, very wet or dry conditions and may even need to survive the acid-filled digestive tract of an animal. In short, seeds have developed over millions of years with defenses to survive awful conditions. But in your modern day garden, a seed is relatively pampered. Soaking seeds before planting helps you to break down the seed’s natural defenses against what it expects from Mother Nature, which then allows it to germinate faster.
Another reason is that while Mother Nature actively assaults seeds, she also gave those seeds an internal gauge to help them know when they should grow. For most seeds, moisture levels play a big role in alerting a seed to optimal grow times. By soaking the seeds, you can quickly boost the moisture content around the seeds, which signals to the seed that it is now safe to grow.
And lastly, for some types of seeds, they actually contain germination inhibitors that are designed to prevent a seed from germinating inside the fruit. These inhibitors must be leached away before a seed can germinate. In nature with natural rainfall, this process can take some time. But when you soak your seeds, this process is sped up.
Seed soaking, at a basic level needs two things: seeds and water.
Some methods for seed soaking may substitute the water for slightly acidic solutions, such as weak tea or coffee or even acidic chemicals. These acidic solutions are meant to imitate loosely the stomach acid of an animal. But these solutions are not necessary in most cases. For most seeds, water will work just fine.
Take a small bowl and fill it with water from your tap, as hot as your tap will allow. Some seeds can tolerate boiling water, but as the tolerance for heat can vary greatly from species to species, hot tap water is safest for seed soaking.
Once your bowl is filled with hot water, place your seeds inside the bowl, then allow the seeds to stay in the water as it cools down. Common questions at this point include “How long should seeds be soaked?” and “Can you over soak seeds?” Yes, you can over soak seeds. Too much soaking in water and a seed will drown. It is recommended that you only soak most seeds for 12 to 24 hours and no more than 48 hours. The seeds of some species of plants can survive longer soakings, but you should only do this if the specific instructions for this species recommend so.
There are things you can do to improve how well your seeds react to soaking. Large seeds or seeds with particularly hard coats can benefit from scarification before soaking. Scarification means to damage the seed coat in some way so that the water is better able to penetrate the seed. Scarification can be done through several methods. These include rubbing the seed on fine grain sand paper, nicking the seed coat with a knife and even gently tapping the seed with a hammer to help crack the seed coat.
After soaking your seeds, they can be planted as directed. The benefit of soaking seeds before planting is that your germination time will be reduced, which means you can have happy, growing plants faster.
Article printed from Gardening Know How: http://www.gardeningknowhow.com
URL to article: http://www.gardeningknowhow.com/garden-how-to/seeds/soaking-seeds.htm
Occasionally the Creative Garden Patch re-posts what we consider relevant information curated from other sources. If you like what you read, please consider visiting the source site and checking it out for more useful information and another valuable resource for your successful gardening. Like the Creative Garden Patch on Facebook to get all of our re-posts.
The following article by Kristi Waterworth is from Gardening Know How.
“Like” Gardening Know How on Facebook
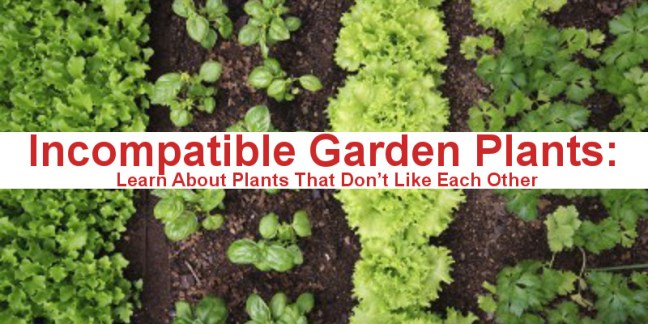
Gardeners do all they can to keep their plants happy and healthy, but sometimes, no matter what you do, certain plants just don’t go together. Plants that don’t like each other may be responding to different environmental needs, could be in direct competition with one another for major resources or one may attract insects that severely harm the other. Determining plant incompatibility can be a guess and check situation since soil types also have an influence on what plants should not be planted together.
There are a few basic rules of thumb when it comes to plants to avoid near one another. First, check that your garden plants are all about the same size and have the same light requirements. Planting very tall plants like tomato [1] next to bush beans [2], for example, is a very bad idea since the tomatoes will very likely shade out the beans.
When planting taller and shorter plants together, make sure that the shorter plants are spaced far enough away and orientated [3] so the sun will shine on them during the day. Many gardeners solve this problem by putting the shortest plants in their own row on the edge of the garden or planted as a border planting.
Plants that need a lot of water will cause those water haters nearby a great deal of discomfort – the same goes for fertilizer. It’s always a good idea to plant things with similar nutritional and water needs together, unless they’re fiercely competitive. Even then, you can often compensate by spacing them extra wide and providing enough fertilizer and water for both types of plants.
Last, but not least, are the plants that are allelopathic [4]. Allelopathic plants have the capability to chemically impede the vital systems of competing plants. These plants are usually weeds, but many landscape and crop plants have been observed leaving behind allelopathic chemicals. Plant scientists are using these observations to develop better methods of weed control for farms and gardens alike.
Many plants are believed to have allelopathic behaviors, but many remain in the realm of garden lore and lack substantial scientific documentation. Research in this area is sparse, but the list of plants believed to have allelopathic properties include:
Black walnuts [14] have long been known to interfere with garden plants like tomatoes, eggplants [15] and corn [16].
When planting broccoli in your garden, make sure that you practice good crop rotation [17] since broccoli can leave behind residue that other cruciferous crops [18] can’t tolerate.
Some plants, like alfalfa [19], seem to exhibit a remarkable type of allelopathy that interferes with the germination of their own seeds.
Garlic [20] and onions [21] are believed to interfere with the growth of beans and peas, but seem to be compatible with most other garden denizens.
Other commonly believed plant incompatibilities include the following plants to avoid near one another:
Article printed from Gardening Know How: http://www.gardeningknowhow.com
Have any questions about this topic? Visit us at http://questions.gardeningknowhow.com to ask your questions and get friendly answers from gardening experts.
Copyright © 2015 Gardening Know How. All rights reserved.

We have moved in an organic direction with the vegetable gardens for the past five years. We decided that if we are going to grow vegetables it makes sense to make the effort to produce great tasting, nutritious vegetables free of artificial fertilizers, pesticides, and other chemicals. It was a moving back to the land kind of idealism of growing and processing our own food that made the concept attractive.
We heard all the excuses about lower production, insects will prevail, and it is too hard to go organic. Our wish to have healthy great tasting food, however put us to work researching garden methods that would be productive, low maintenance, and incorporate organic production.
We decided to start with raised beds. The “upper garden” now has eight raised beds and we have started using Square Foot Gardening. Two years ago the “lower garden” was started. It is a 30’ by 75’ area and is developing as a Raised Row Garden. A section of the lower garden is for experimenting with other techniques. An earlier post describes our summer 2015 experiments including Straw Bale Gardening.

Here are some things we feel are important if you are going organic.
1. Learn about your soil
2. Learn about natural organic fertilizers
3. Learn how to protect your garden and keep it healthy
Today’s posting, Part I of our Learning Curve addresses soil.
1. The structure of Soil is the foundation of organic gardening. It is necessary to know as much as you can about the soil’s texture, pH levels, and the eco-system.
Texture relates to the components that make up the soil. The three main components are sand, silt, and clay. The percentage of each in a soil sample will determine the texture of the soil. Soil structure can range from sandy and loose to clay and compacted. Soils high in sand content tend to drain quickly and not hold moisture needed for growth. Soils high in clay content do not drain well and hold too much moisture that can lead to root rot and kill your plants. A “feel” test can help determine your soil texture. Sandy soils will feel gritty and when moist will not clump together. Silt soils feel powdery when dry and will clump loosely when damp. Clay soils will clump tightly when squeezed and will mold together when damp.
Healthy soil also has organic matter supplied by decaying plant and animal waste. Healthy soil has that nice earthy aroma that gardeners thrive on. The organic matter is necessary for plant nutrition and feed for the living micro-organisms living in the soil. Everything from microscopic bacteria, fungi and beneficial insects make up the soils eco-system. The soil needs to be alive! Repeated use of commercial fertilizers over the years can “kill” the soil. The soils eco-system is the basis of organic gardening.
Time to recall your high school chemistry acids and bases. The pH scale goes from 0 to 14 with 7 as the mean. The pH of the soil is important as it will determine the plant’s ability to use nutrients in the soil. Most vegetables need a pH level around 6.5 in order to uptake the available nutrients in the soil.  Home test kits are available at your garden center to test your soil pH. We test each bed and row every year and plant or adjust the pH accordingly. Adding lime to the soil will raise the pH level decreasing acidity. Adding sulphur to the soil will decrease the pH level decreasing the alkalinity. Be sure that the additive you use is approved safe for organic gardening. More on plants and the effects of pH on nutrient uptake and soil pH modification can be found here.
Soil structure is so important to the success of the organic garden that we constantly amend the soil. Successful organic gardening means making your own compost, lots of it and adding to the growing areas. It means planting cover crops as “green manure” and most importantly, testing and monitoring your growing beds. Always remember to keep records of your results.
The more you improve soil structure the healthier your garden will be. Healthy plants are disease free and less attractive to detrimental insects. The stronger your soil structure the lower the labour needed to enjoy your own nutritious, chemical free fruit and vegetables.
We are still learning and have a long way to go yet. Should you wish to dig deeper into soil structure, check out Phil Nauta at the The Smiling Gardener.
In the next post, we share our learning and experiences with natural fertilizers and tips to keeping a healthy garden.
Still waiting for the snow to go!
Tom and Di

One of the goals for our garden is to meet our defined needs of fresh, nutritious, organic produced food, for canning, pickling, freezing, and winter storage. We also wanted to meet our food likes and prepare meals from the fresh foods and stored foods from the garden. Hence the concept of Menu Planting. We like beet greens, so we plant beets just for the greens two to three times through the season. We love Hodge Podge so we plant green and yellow bush beans, peas, and an early potato. We are very fond of a Grilled Caesar Salad. so we plant Romaine Lettuce. We like eating roasted vegetables, grilled vegetables, love Italian food, enjoy stir fry and of course need salsa. Menu planting is simply planting for the meals you enjoy.
You can menu plant easily in any garden. A common method is to use a raised bed for specific needs, such as a salad garden, salsa garden, Italian garden, etc. We will have some special beds, but for the most part, our menu planting is throughout the garden.

Fresh Garden Salsa
Use a medium sized bowl to combine
• 4 cups finely chopped tomatoes
• 1/2 cup minced onion
• 1/2 cup chopped cilantro
• 1 jalapeno minced or bell pepper for milder
• 1 teaspoon salt
• 1/2 teaspoon fresh ground black pepper
• 2 cloves garlic finely chopped
• 1 lime (juice and zest)
Mix well, place in the refrigerator a few hours before serving. Enjoy in your garden!
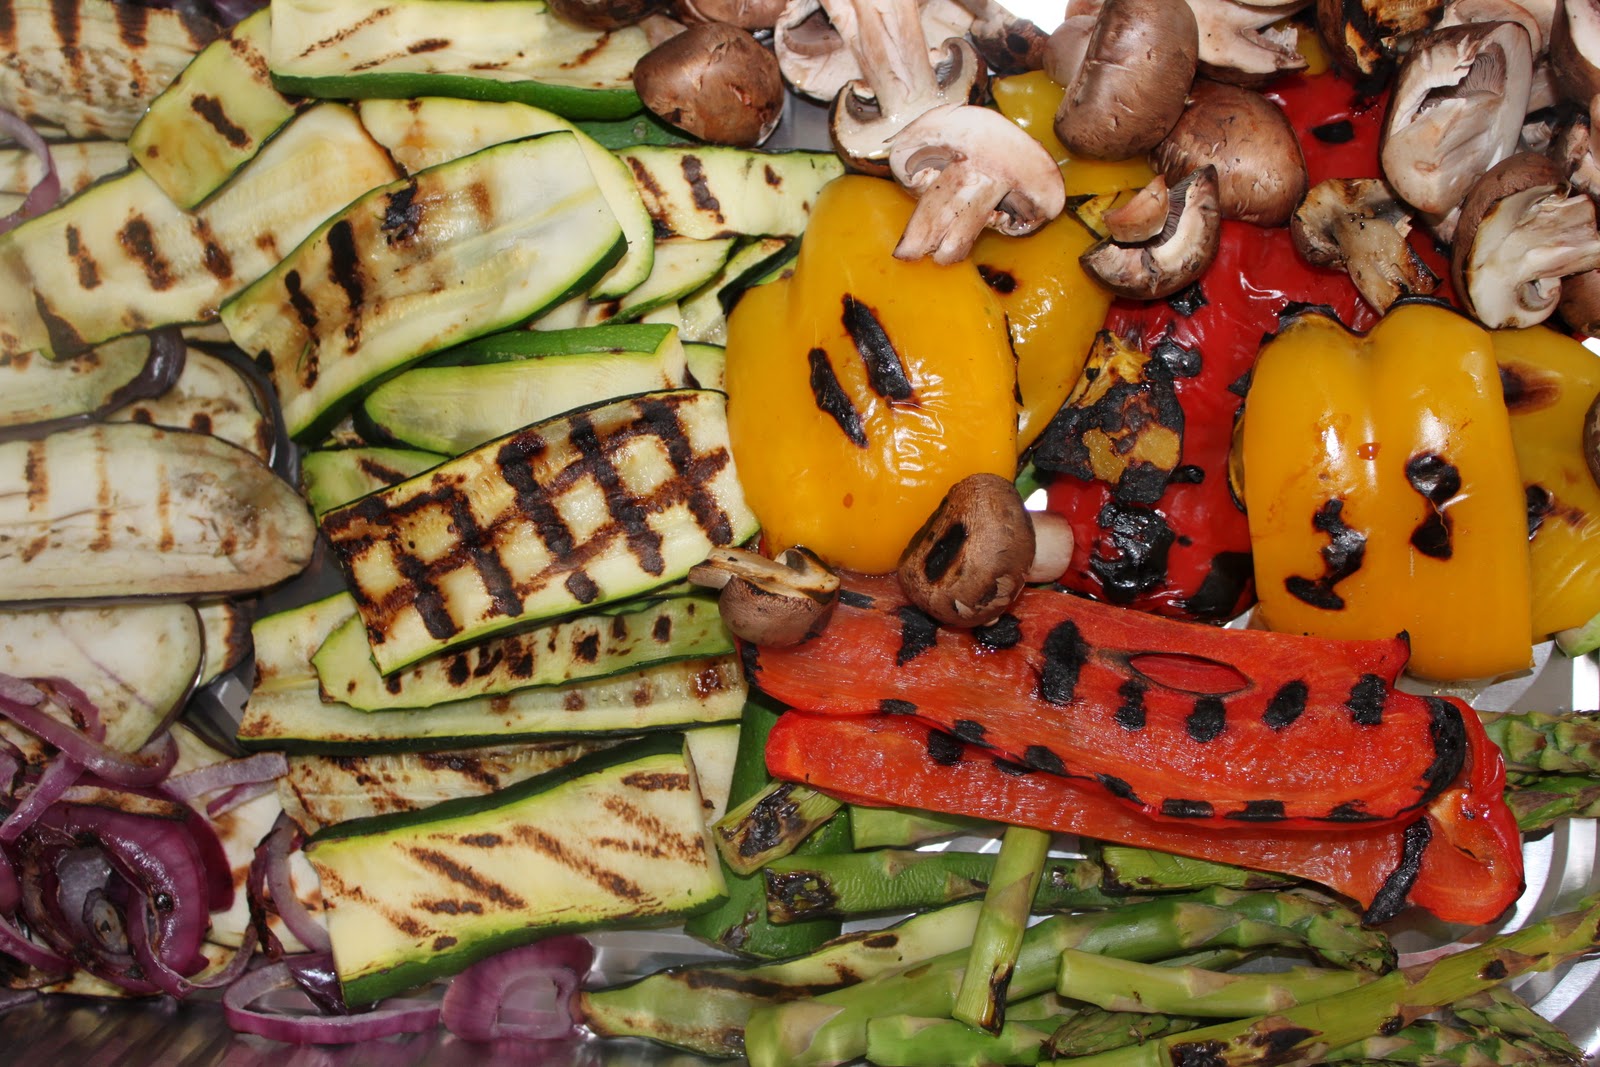 2. Grilled vegetables – Grilled veggies accompany pretty well all our BQ meals. Our favourites include asparagus, green beans, carrots, corn, egg plant, onions, peppers, potatoes, sweet potatoes, squash, green tomatoes, zucchini and Romaine. Keep it simple, slice veggies to size, toss in olive oil, add salt and pepper and place on the heated grill. Grill time varies. General rule is the harder the vegetable, the more time on the grill. Check for tenderness and nice grill marks, garnish with chopped basil, oregano, or rosemary and chow down.
Here is a grilled salad that we enjoy.
Grilled Caesar Salad
Ingredients (Serves 8)
Ciabatta Bread
8 – 10 slices pancetta
3 garlic cloves
4 tablespoons fresh lemon juice
1 1/2 tablespoons Dijon mustard
3/4 cup, plus 3 tablespoons olive oil
2/3 cup freshly grated Parmesan, plus shaved Parmesan for serving
4 heads romaine hearts, sliced lengthwise in 1/2
Salt and freshly ground black pepper
Directions
1. Preheat grill to high.
2. In a blender, combine the garlic, lemon juice and Dijon mustard. Drizzle in 3/4 cup olive oil to emulsify. Add the Parmesan and pulse.
3. Cut ends off bread and save for another use. Cut bread into 16 slices and lightly brush both sides with Caesar dressing.
4. Grill bread for approx. 10 sec. per side or just long enough to toast and pick up grill marks. Remove from grill.
5. Heat pancetta for 10 sec. on each side, (use a pan on the grill)
6. Cut romaine in half length wise, drizzle romaine in olive oil and season with salt and pepper. Grill for 2 minutes, until grill marks appear and the romaine becomes wilted.
7. On each of eight salad plates, arrange Romaine lettuce halves, pancetta, ciabatta toasts.
8. Drizzle with dressing, add pancetta, garnish with shaved Parmesan and serve.
3. The Italian Menu – Vegetables needed for our love of Italian food include tomatoes, peppers, onions, garlic, greens, beans, squash, zucchini, asparagus, Required herbs are basil, oregano, rosemary, parsley. Besides enjoying fresh ingredients in our Italian eating, we can tomatoes, tomato sauce, roasted peppers, and beans. We also dry herbs and garlic for use through the winter. If you are gardening with children, help them create a pizza garden and of course, make a pizza from the bounty of their garden.
Here is a link to a sample Pizza Garden.
Plant and grow what your family likes to eat and plan your menus around the food you grow.
Herb garden, stir fry garden, pickling garden?

Depending on where you live, you have either started or getting ready to start seeds for this year’s garden. There is a lot of information available on how to start seeds indoors. A quick Google search comes up with over 600,000 references on how to start seeds indoors. So you can get the basics through a quick search. Today’s blog will be about what we have learned. What has worked and provided success for our seed starting.
Here are some things we have learned over the years about stating seeds indoors.
1. Resist starting too early – Use the “last frost” date as a guide. A quick check of the Farmer’s Almanac (Canada, US) will present the last frost date for your part of the world. In our case, around May 20th would be the ”last frost date”. Using May 20th as our guide, we check journal entries for previous years and determine a planting date. The planting date is when the seedlings go in the ground or other seeds are direct sown. For seedlings, it is important to account for “hardening off” in your calculations (7-10 days). More important than frost date is the soil temperature. For most of the last 5 years the soil temperature becomes suitable for transplanting May 24th to June 1st.

If you use the Garden Planer print out the planting guide for the garden you designed. A Gantt chart showing starting dates, planting dates and harvest dates is produced to guide you through the garden season.
You can download a Seed Starting Planner from The Organic Gardener website to help in your planning.
Example: Roma Tomatoes: Start 6-8 weeks before last frost date May 20th. (March 25th – April 8th) Planting date of June 1st less 8-10 days hardening off, puts us at May 23rd to May 25th. So anytime between March 25th to April 8th works for us based on the Farmers Almanac, our set out dates of past years, and our recorded soil temperatures the last five years. 2. Keeping good records gives confidence in your planting!
3. Starting containers – Almost any container can be used to start seeds. Be sure they are clean by washing in soap and water and rinsing in a mild bleach solution. Provide some drainage to the bottom and place in waterproof trays. This allows for bottom watering.
4.Bottom watering will increase your success in starting seeds. We have always used biodegradable peat pots for containers and black plastic trays designed for seed starting. If you want to make your own, here are 7 DIY Seed Pots you can make.
5. Quality Starter Mix – Use a quality seed starter mix. A soiless mix, usually a combination of peat moss and vermiculite is best. We avoid starting mixes that are “pre-fertilized” preferring to use organic fertilizers latter. You can also make your own starter mix and take complete control.
6. Carefully sow seed – Sow what you need. If you plan on four pepper plants in your garden, then sow 8 seeds, two per container. At a low 50% germination , you will have your four pepper plants and maybe some extras for your friends. Make sure the grow mix is moist and sow seed according to the instructions on the package. Seed depth is important. Usually the seed is sown to a depth of three times it’s size. Place seeds carefully on the surface of the mix and sprinkle an appropriate amount of mix on top of the seed. Sow 3 to 4 seeds per pot and thin to 2 or 3 after germination if needed. Cover the seeded tray with sheet of plastic, saran wrap or plastic dome. You will eventually move each seeding to a lager pot. We have found that cucumbers are an exception as they do not like being disturbed too much. We start cucumbers in larger bio-degradable pots to avoid over handling and transplant directly to the garden.
7. Warmth is Important – Bottom heat is needed for good seed germination. You can provide for warmth by using a heating pad designed for seed starting, placing trays on top of your fridge, or a space heater set up to give warmth to the bottom of the trays. If you have heated floors in your house lay your trays out and watch your step! You will have results without the bottom warmth, but you will have better results with bottom warmth. Once the seeds have germinated, remove from heat source. Seedlings do not need the same warmth. Be sure to maintain a moist soil and be careful not to over water.
8. Use artificial light – Once germinated the seedlings will need lots of light. The seedlings will fight for light and reach out for it. Seedlings will become weak and spindly without an adequate light source. Use an artificial light source (fluorescent) hung just above the seedlings, raise the light as the seedlings grow and provide light for about sixteen hours a day.
9. Feed the seedlings – After the seedlings have the first true leaves use a weak solution (1/4 of normal) organic fertilizer (compost tea, fish emulsion and seaweed extract) every 1-2 weeks until they’re ready for planting out.
10. Get a Fan – After transplanting seedlings to larger pots, place a fan to blow gently over the seedlings through the day. This will help develop a stronger and hardier plant. You can gently brush your hand over the seedlings a couple times a day as well.
11. Be ruthless – Thin your seedlings to allow only the strongest and healthiest to continue.
12. Be patient – Check the germination trays and the seedlings each day. Also if you do not have a heated green house to accommodate starting your own seeds, be prepared to have your home taken over. for a couple of months!
Some thoughts
Starting your own seeds is not difficult, but requires planning, a methodical approach, patience and TLC. Remember to make journal entries of your seed starting experiences.
Share the magic with others in your household. Involve children is the garden cycle from the beginning. Allow them to start their own seeds for their own garden and provide the care needed.
The rewards are well worth the effort when you bite into a sun drenched Big Beef Tomato that you started as a tiny seed in April. You also know the source of the food you eat and know how it was grown.
Time to prepare the soil mix and fill some pots.
Tom and Di

Today we are experiencing a late winter snow storm and is a good time to do some more thinking and planning for the garden. Each year we try new things. If they work, we will continue to use them. This year the plan is to try two new vegetables and three different growing methods.
We have chosen five gardening experiments for the 2015 season.

You are invited to follow us as we update our experiments through the growing season. We also welcome any advice you have on any of our gardening experiments. Please use the comment section on Facebook or on WordPress.
Come on spring!
Tom and Di
