Menu Planting

One of the goals for our garden is to meet our defined needs of fresh, nutritious, organic produced food, for canning, pickling, freezing, and winter storage.  We also wanted to meet our food likes and prepare meals from the fresh foods and stored foods from the garden.  Hence the concept of Menu Planting.   We like beet greens, so we plant beets just for the greens two to three times through the season.  We love Hodge Podge so we plant green and yellow bush beans, peas, and an early potato.  We are very fond of a Grilled Caesar Salad. so we plant Romaine Lettuce.  We like eating roasted vegetables, grilled vegetables, love Italian food, enjoy stir fry and of course need salsa.  Menu planting is simply planting for the meals you enjoy.

You can menu plant easily in any garden. A common method is to use a raised bed for specific needs, such as a salad garden, salsa garden, Italian garden, etc. We will have some special beds, but for the most part, our menu planting is throughout the garden.

  1. Salsa Garden – Some vegetables to include in the salsa garden are tomatoes, tomatillos (need two plants for cross pollination), bell peppers, chile peppers, onions, garlic, and cilantro.  Your personal taste will determine choices of peppers from mild through super hot varieties.  Use colour, such as red onion, different colour tomatoes and peppers.  Remember, if you want garlic, it is planted in the fall. Here is a sample salsa garden produced with the Garden Planner.

    Salsa Garden (Garden Planer)
    Salsa Garden (Garden Planer)

Fresh Garden Salsa
Use a medium sized bowl to combine
• 4 cups finely chopped tomatoes
• 1/2 cup minced onion
• 1/2 cup chopped cilantro
• 1 jalapeno minced or bell pepper for milder
• 1 teaspoon salt
• 1/2 teaspoon fresh ground black pepper
• 2 cloves garlic finely chopped
• 1 lime (juice and zest)
Mix well,  place in the refrigerator a few hours before serving. Enjoy in your garden!

Grilled Vegetables Kosher
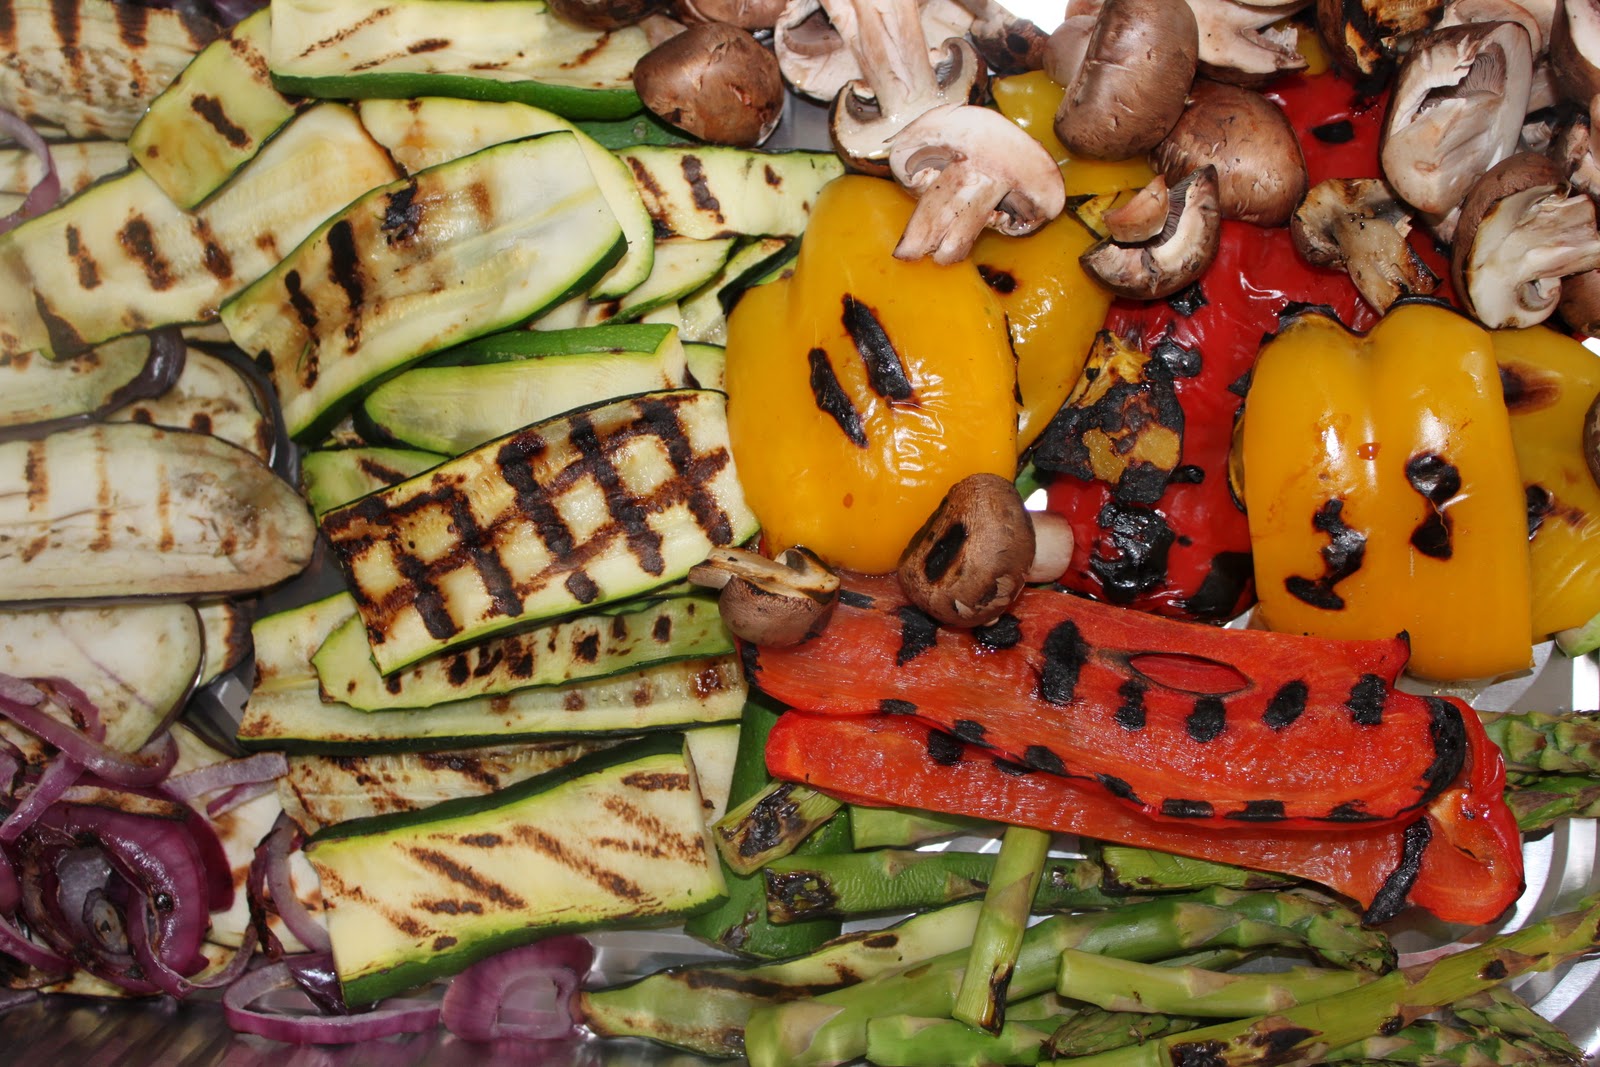
2. Grilled vegetables – Grilled veggies accompany pretty well all our BQ meals.  Our favourites include asparagus, green beans, carrots, corn, egg plant, onions, peppers, potatoes, sweet potatoes, squash, green tomatoes, zucchini and Romaine.  Keep it simple, slice veggies to size, toss in olive oil, add salt and pepper and place on the heated grill.  Grill time varies.  General rule is the harder the vegetable, the more time on the grill.  Check for tenderness and nice grill marks, garnish with chopped basil, oregano, or rosemary and chow down.

Here is a grilled salad that we enjoy.

Grilled Caesar Salad

Ingredients (Serves 8)
Ciabatta Bread
8 – 10 slices pancetta
3 garlic cloves
4 tablespoons fresh lemon juice
1 1/2 tablespoons Dijon mustard
3/4 cup, plus 3 tablespoons olive oil
2/3 cup freshly grated Parmesan, plus shaved Parmesan for serving
4 heads romaine hearts, sliced lengthwise in 1/2
Salt and freshly ground black pepper

Directions
1. Preheat grill to high.
2. In a blender, combine the garlic, lemon juice and Dijon mustard. Drizzle in 3/4 cup olive oil to emulsify. Add the Parmesan and pulse.
3. Cut ends off bread and save for another use. Cut bread into 16 slices and lightly brush both sides with Caesar dressing.
4. Grill bread for approx. 10 sec. per side or just long enough to toast and pick up grill marks. Remove from grill.
5. Heat pancetta for 10 sec. on each side, (use a pan on the grill)
6. Cut romaine in half length wise, drizzle romaine in olive oil and season with salt and pepper. Grill for 2 minutes, until grill marks appear and the romaine becomes wilted.
7. On each of eight salad plates, arrange Romaine lettuce halves, pancetta, ciabatta toasts.
8. Drizzle with dressing, add pancetta, garnish with shaved Parmesan and serve.

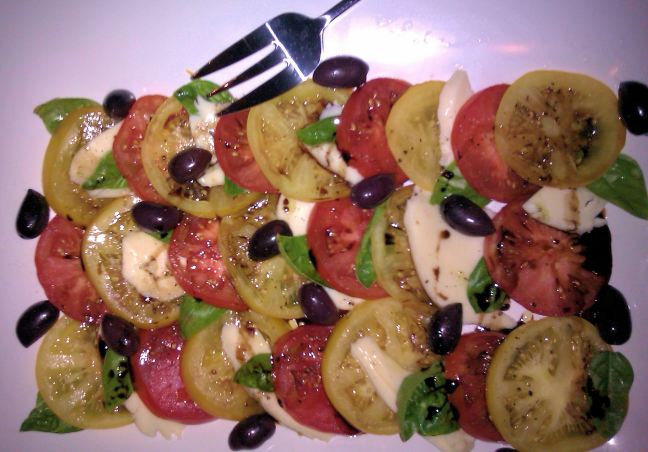
3. The Italian Menu – Vegetables needed for our love of Italian food include tomatoes, peppers, onions, garlic, greens, beans, squash, zucchini, asparagus,   Required herbs are basil, oregano, rosemary, parsley.  Besides enjoying fresh ingredients in our Italian eating, we can tomatoes, tomato sauce, roasted peppers, and beans.  We also dry herbs and garlic for use through the winter.  If you are gardening with children, help them create a pizza garden and of course,  make a pizza from the bounty of their garden.

Here is a link to a sample Pizza Garden.

Plant and grow what your family likes to eat and plan your menus around the food you grow.

Herb garden, stir fry garden, pickling garden?


What we have learned about starting seeds

Depending on where you live, you have either started or getting ready to start seeds for this year’s garden. There is a lot of information available on how to start seeds indoors.  A quick Google search comes up with over 600,000 references on how to start seeds indoors.  So you can get the basics through a quick search.  Today’s blog will be about what we have learned.  What has worked and provided success for our seed starting.
Here are some things we have learned over the years about stating seeds indoors.
1. Resist starting too early  –  Use the “last frost” date as a guide.  A quick check of the Farmer’s Almanac (Canada, US) will present the last frost date for your part of the world. In our case,  around May 20th would be the ”last frost date”.  Using May 20th as our guide, we check journal entries for previous years and determine a planting date.  The planting date is when the seedlings go in the ground or other seeds are direct sown.  For seedlings, it is important to account for “hardening off” in your calculations (7-10 days).   More important than frost date is the soil temperature.  For most of the last 5 years the soil temperature becomes suitable for transplanting May 24th to June 1st.

Plant List from Garden Planer (Enlarge)

If you use the Garden Planer print out the planting guide for the garden you designed. A Gantt chart showing starting dates, planting dates and harvest dates is produced to guide you through the garden season.

You can download a Seed Starting Planner from The Organic Gardener website to help in your planning.

Example: Roma Tomatoes:  Start 6-8 weeks before last frost date May 20th.  (March 25th – April 8th)  Planting date of June 1st less 8-10 days hardening off, puts us at May 23rd to May 25th.  So anytime between March 25th to April 8th works for us based on the Farmers Almanac, our set out dates of past years, and our recorded soil temperatures the last five years. 2. Keeping good records gives confidence in your planting!

3. Starting containers – Almost any container can be used to start seeds. Be sure they are clean by washing in soap and water and rinsing in a mild bleach solution. Provide some drainage to the bottom and place in waterproof trays.  This allows for bottom watering.

4.Bottom watering will increase your success in starting seeds.  We have always used biodegradable peat pots for containers and black plastic trays designed for seed starting.  If you want to make your own, here are 7 DIY Seed Pots you can make.

5. Quality Starter Mix – Use a quality seed starter mix.  A soiless mix, usually a combination of peat moss and vermiculite is best.  We avoid starting mixes that are “pre-fertilized” preferring to use organic fertilizers latter.  You can also make your own starter mix and take complete control.

6. Carefully sow seed – Sow what you need. If you plan on four pepper plants in your garden, then sow 8 seeds, two per container.  At a low 50% germination , you will have your four pepper plants and maybe some extras for your friends.  Make sure the grow mix is moist and sow seed according to the instructions on the package.  Seed depth is important. Usually the seed is sown to a depth of three times it’s size.  Place seeds carefully on the surface of the mix and sprinkle an appropriate amount of mix on top of the seed. Sow 3 to 4 seeds per pot and thin to 2 or 3 after germination if needed.   Cover the seeded tray with sheet of plastic, saran wrap or plastic dome. You will eventually move each seeding to a lager pot.  We have found that cucumbers are an exception as they do not like being disturbed too much.  We start cucumbers in larger bio-degradable pots to avoid over handling and transplant directly to the garden.

7. Warmth is ImportantBottom heat is needed for good seed germination. You can provide for warmth by using a heating pad designed for seed starting, placing trays on top of your fridge, or a space heater set up to give warmth to the bottom of the trays. If you have heated floors in your house lay your trays out and watch your step!  You will have results without the bottom warmth, but you will have better results with bottom warmth.  Once the seeds have germinated, remove from heat source.  Seedlings do not need the same warmth.  Be sure to maintain a moist soil and be careful not to over water.

8. Use artificial light – Once germinated the seedlings will need lots of light.  The seedlings will fight for light and reach out for it.  Seedlings will become weak and spindly without an adequate light source. Use an artificial light source (fluorescent) hung just above the seedlings, raise the light as the seedlings grow and provide light for about sixteen hours a day.

9. Feed the seedlings – After the seedlings have the first true leaves use a weak solution (1/4 of normal) organic fertilizer (compost tea, fish emulsion and seaweed extract)  every 1-2 weeks until they’re ready for planting out.

10. Get a Fan – After transplanting seedlings to larger pots, place a fan to blow gently over the seedlings through the day.  This will help develop a stronger and hardier plant.  You can gently brush your hand over the seedlings a couple times a day as well.

11. Be ruthless – Thin your seedlings to allow only the strongest and healthiest to continue.

12. Be patient – Check the germination trays and the seedlings each day.  Also if you do not have a heated green house to accommodate starting your own seeds, be prepared to have your home taken over. for a couple of months!

Some thoughts

Starting your own seeds is not difficult, but requires planning, a methodical approach, patience and TLC.  Remember to make journal entries of your seed starting experiences.

Share the magic with others in your household.  Involve children is the garden cycle from the beginning.  Allow them to start their own seeds for their own garden and provide the care needed.

The rewards are well worth the effort when you bite into a sun drenched Big Beef Tomato that you started as a tiny seed in April.  You also know the source of the food you eat and know how it was grown.

Time to prepare the soil mix and fill some pots.

Tom and Di


Garden Experiments for 2015

Today we are experiencing a late winter snow storm and is a good time to do some more thinking and planning for the garden.  Each year we try new things.  If they work, we will continue to use them.  This year the plan is to try two new vegetables and three different growing methods.

We have chosen five gardening experiments for the 2015 season.

  1. Asparagus bed – We have put off this for about three years, so this year it is time.  Roots are already ordered so no turning back.  Two varieties we selected are, Jersey Giant and Purple Passion.  The roots are sent to us in the spring for planting time in our growing zone.
  2. Sweet Potatoes – We have chosen Covington, an early variety that will mature in short season areas. Unrooted vines are shipped in the late spring.  With proper care we will be enjoying sweet potato fries this fall.
  3. Straw Bale Garden – Plan to experiment with about four bales and try to grow a variety of vegetables. A wood crate structure will confine the sides of the four bales. The plan is to then use the Square Foot Garden Method to plant.  More information on Straw Bale Gardens can be found here.

    Vertical potatoes
    Vertical potatoes
  4. Vertical Potatoes Have always been intrigued by this method to grow potatoes.  If successful, we plan to build more towers and eliminate the rows of potatoes from the garden to free up space.
  5. Sawdust bed – We were traveling in south-west Nova Scotia when first observed huge vegetables growing in sawdust.  The key as we found out, was old sawdust.  Old was very old, like 25 years or more!  Well near the homestead are the remains of an old mill.  There has been no production for over 40 years and there is also a huge deposit of old sawdust.  Our plan is to check it out and seek permission from the land owner (if we can find them) and see if we can make our sawdust gardening experiment a reality.  We will build a raised bed and again use the SFG method to grow a variety of vegetables and flowers.  We are also going to use a mixture of sawdust and compost for our experiment.

You are invited to follow us as we update our experiments through the growing season.  We also welcome any advice you have on any of our gardening experiments. Please use the comment section on Facebook or on WordPress.

Come on spring!

Tom and Di

A Comfort Food Day

Monday was what I call a “comfort food” day and one of our favorite comfort food lunches is Tomato Soup and Grilled Cheese.  Keeping with our gardening goals we like to grow food that can be preserved for use later.  We make our own tomato soup base and freeze for use on days like yesterday.  Here is the recipe for the soup base.

Tomato Soup Base
4 cups chopped fresh tomatoes
1 sliced onion
4 whole cloves
2 cups chicken broth (homemade is best!)

In a stockpot, over medium heat, combine the tomatoes, onion, cloves and chicken broth. Bring to a boil, and gently boil for about 20 minutes to blend all of the flavors. Remove from heat and run the mixture through a food mill into a large bowl, or pan. Discard any stuff left over in the food mill.
Proportion into freezer bags. Remove as much air as possible and seal bag. Soup base can now be frozen for use later.
To make Tomato soup, melt 2 tablespoons of butter in a stockpot using medium heat. Stir in 2 tablespoons of all-purpose flour to make a roux. Continue cooking until the roux is medium brown. Gradually whisk in a bit of the tomato mixture, so no lumps form, then stir in the rest. Season with sugar and salt to taste. Serve with your favorite grated cheese on top and some fresh basil.
Use your favorite flavourful tomatoes. We have used Brandywine, Scotia, and Lemon Boy. Lemon Boy provides for different colour and less acid taste.

Make your favourite grilled cheese to accompany the tomato soup. We use 5 year aged cheddar, sliced baked ham, and tomato jam.  (I add an extra tablespoon of tomato jam to the plate for dipping.) The tomato jam is made from our own tomatoes and “put up” for later use. It is great with burgers, sausage, almost anything you can spread it on! Here is the recipe for the Tomato Jam.

Sweet Tomato Jam
6 fresh tomatoes
1 “thumb” (2.5 cm) ginger root grated
4 shallots, sliced
2 cloves garlic, sliced
½ cup brown sugar (125 ml)
½ cup cider vinegar (125 ml)
½ cup water (125 ml)
1 pod Star Anise

Place all ingredients into a saucepan and cook at medium heat until water evaporates. Usually takes 1 to 1½ hours. Continue to cook until jam stage, about another 20 minutes Do a drop test. Put a bit of jam onto a plate and place in refrigerator for two minutes. If the jam sets than the jam is ready. Place in jars and process for 15 minutes.

One small way to enjoy your garden all year around.

Cheers

Tom


Find the Magic

In an earlier post, we shared our gardening goals (Garden Planning – Set Goals for Your Garden).  People will choose to garden for whatever purpose meets their needs. People will garden in different ways.  From patio containers to large agricultural production.  Traditional rows to raised beds and square foot gardening.  Some like us will experiment with many ways to meet our gardening needs.

There are many other reasons people choose to garden.  Activity and fitness, stress relief, get outdoors, 10806484_403419183141005_5096243297421317243_nenjoy nature, are all reasons people garden.  Whatever your reason or purpose is to garden,  we hope you can find the magic!  That childhood sense of wonder that exudes from your garden as the landscape evolves from barren earth to green foliage bearing colourful fruit.  The miracle of tiny seeds to giant sunflowers, or the white blossom to the deep red strawberry warmed in the summer sun and exploding with sweetness.  The wondrous creatures that visit our gardens or inhabit the subterranean world.  With no slight of hand, the magic unfolds before our eyes every day we are in the garden.

Believe in the magic of your garden and you will find it.  Bring your children or grandchildren to your garden and discover the magic with them.  Perhaps it is this “magic” that brings gardeners to the patch of earth we so enjoy.

“And above all, watch with glittering eyes the whole world around you because the greatest secrets are always hidden in the most unlikely places. Those who don’t believe in magic will never find it.”
― Roald Dahl

 Until next time

Tom and Di

Satisfying the Gardening Itch

Our planning and preparation continues.  Seed inventories done, and browsing seed catalogs and seed websites continues.  New asparagus roots ordered, vegetable seeds ordered, and some seeds have already arrived.

Both gardens now have four feet of the white stuff snuggling them.  Hard to believe that spring is only nineteen days away.  There are some positive signs that spring is near, the light of day has grown longer and the warmth of the sun continues to increase, spring training has started in baseball, and there are only two months left before the Stanley Cup Playoffs are over.

The other sign for gardeners is that itch Garden 003to get scratching in the dirt.  The desire to get started and smell the earthy aromas of soil and rotting compost.  Here in New Brunswick we will have to wait another six to eight weeks. There are, however, some things you can do to help satisfy those urges.

  • March is the time to start seeds indoors. White, Red and green onions will be started this week. Several of our flowers will be started as well. Check the frost dates for your area and the planting instructions on the seed pack.  Generally seeds are started indoors four to eight weeks before the last frost date.  We use May 15th as a guide, so if the seeds need to be started six weeks prior to the last frost, we will start on or before April Fools’ Day!
  • Get a start on new projects you are planning for the gardens.  Our new plans include:
    • 2 trellises for the cucumbers
    • Stacking boxes for the vertical potatoes experiment
    • Crates for the straw bales experiment
    • New stakes and row markers
    • More tomato cages
    • New cold frame for large raised bed.
    • 2 new raised bed boxes
  • On the stormy days or evenings, grab a gardening book and Garden tipsdiscover new tips to add to your gardening knowledge.  A good one to spend time with is 1,001 Old-Time Garden Tips edited by Roger Yepsen.  The book includes “timeless bits of wisdom on how to grow everything organically, from the good old days when everyone did”.
  • Then of course is one of our favourites, browse the garden centers.  This usually results in some new and neat tools being added to the shed!

If you have any other suggestions, please share in the comment section.

Until next time,

Tom and Di